Digital Design Portfolio
Image Assignment
The goal of this assignment was demonstrate the mastery of image editing skills, color, and composition. To achieve this I pulled several photos from scans I had made during a research trip and attempted to restore and apply various effects to them.
For reference here are the different techniques we were asked to apply to our photos:
- a cropped & resized image
- a restored photograph
- a hand-colored photograph
- a vignetted photograph
- a matted engraving
- a “before & after” of two examples
Restored Photograph
scrapbook.
The photographs below are images that I scanned from a scrapbook that was filled with clippings from newspapers and magazines. The images were glued into this scrapbook and were often crooked, damaged, and faded from improper storage and care. These images, in many cases, are the only copies that exist or are they exist only in collections that cannot be digitized.
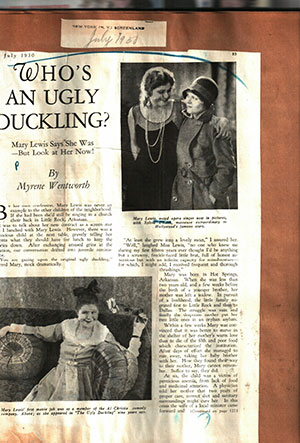
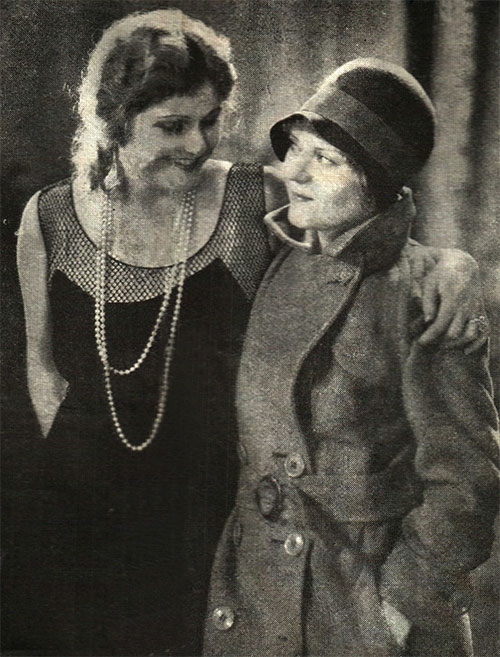
The first image I worked on is one of Sylvia Ullback, a Hollywood Masseuse and beauty expert to the stars, which was scanned from a article in Screenland Magazine. The image shows Sylvia Ullback in New York with Mary Lewis who was one of her clients and a famous Broadway actress. The original image was surrounded by text, somewhat faded, and had blue marker smeared across the top right corner of the image. Additionally, if you look closely at the image there appears to be some sort of a crease that runs down the middle of Mary Lewis's face as well as yellowing around the edges of the photo. To remedy this I used several techniques in Photoshop to restore the image.
First, I cropped and rotated the image so that it was straight in the frame and the surrounding text and white areas were gone. I also removed the caption because I can recreate a caption that is more visually appealing and fits within my design for the final image. Next, I used the auto color, contrast, and levels options in Photoshop to adjust the color and bring back some of the shadows in the photograph. At this point it looked much better, but I still had the blue mark in the top right corner and the crease down the left side of the photo.
To remedy these defects I used the ‘Clone Stamp Tool’. This tool “paints one part of an image over another part of the same image.” This allowed me to copy the areas above and below to get rid of the blue mark. I used the same technique to remedy the crease down the left side and to fix a few other little blemishes. I think the restoration really improved the photograph and restored the quality so that it could be used in a publication or on the web.
Hand Colored
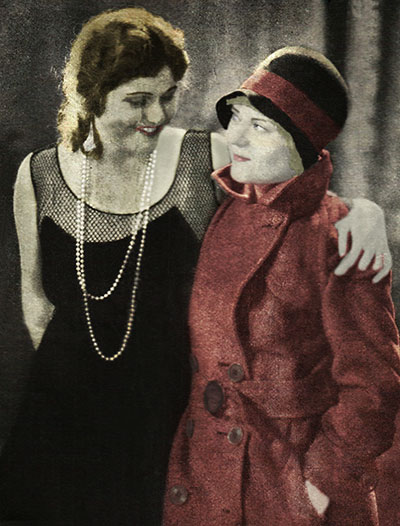
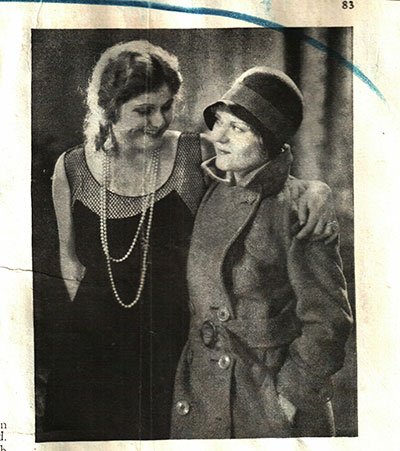
Although there are no color photographs of Ullback, there are many descriptions of her vibrant blue eyes and blonde hair. I decided to use the same photograph of Ullback and Lewis for recoloring. I began by adding several layers that were used to color selected areas of the photo. I decided only to focus on the women in the photo and leave the back ground black and white. Each individual layer was set to ‘overlay’ in the blending properties box and then the opacity was adjusted to fit the desired look. I then used the selection and paint tools to color each area and rearranged the layers to ensure some of the smaller objects like the pearls appeared on top and weren’t lost beneath another color.
Recoloring a historic photo requires more effort than one might think. Making decisions about the colors of individuals clothing is difficult and require thought about the time period. In this case, I knew what Sylvia looked like from descriptions. She was Swedish and her blonde hair and blue eyes were often described. Luckily, I also knew who the others in the photograph were and, since Mary Lewis was an opera star, I also was able to find out what she looked like. However, this process may have been more difficult and brought up other issues if I didn’t know anything about the people in the photograph. I think recoloring photographs could bring up ethical issues for historians and requires strategic decisions in an attempt not to modify or influence the historical meaning of the image.
Vignette
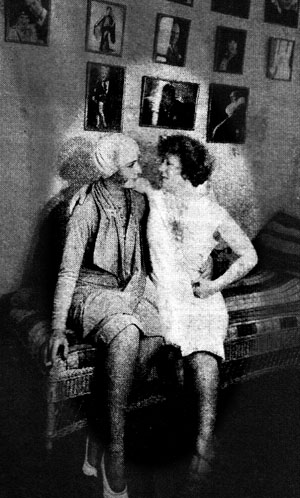
For the Vignette I used a photo that was part of an article in Screenland. The photo is of Sylvia Ullback and one of her clients in Sylvia's studio on the Pathe lot. To create a vignette effect I used the marquee tool to select a portion of the photo. I then selected the inverse of that so that I could make it darker by adjusting the brightness and contrast settings. I think this one didn't turn out quite as well as others just because of the quality of the photo. However, it does crop some of the unecessary background out and instead focuses on what is really important in the photograph.
Matted Engraving
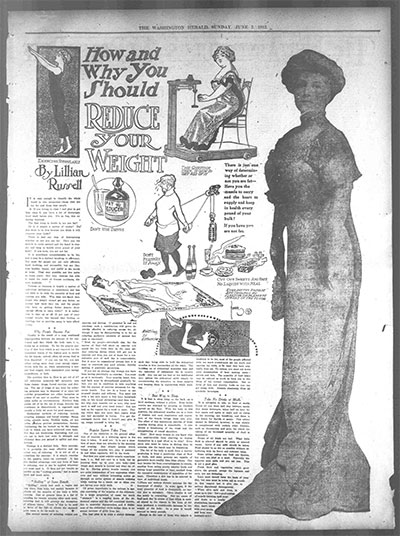
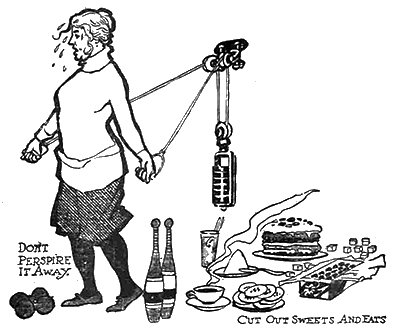
Many of the images about Physical Culture in the early 1900s come from newspapers and are largely engravings or drawings which can be easily cropped and matted for use on the web. For this part of the assignment I chose to use some engravings from an article entitled “How and Why You Should Reduce Your Weight” by Lillian Russell.[1] The article has a number of engravings that demonstrate various points made within the article and the image would be useful, if cleaned up and re-matted, in the narrative of a historical website on reducing.
I first imported the document into Photoshop and cropped it to remove the majority of the text and images I did not need. I then adjusted the coloring using the auto color, contrast and levels settings and erased any remaining blemishes that cropping didn’t catch. The adjustments helped to remove some of the fading in the image and make the colors a bit sharper. The end result is something that I could definitely use on a website or even as an addition to a book or other printed publication.